Are you tired of using the same old keyboard? Want to spice things up with a DAS keyboard? Look no further! This guide will walk you through the step-by-step process of connecting your DAS keyboard to your computer. With a few simple steps, you’ll be up and running in no time. Whether you’re a gamer looking for an edge or just want to try something new, a DAS keyboard can bring a fresh experience to your typing. So let’s get started and connect your DAS keyboard today!
Understanding DAS Keyboards
What is a DAS keyboard?
How does a DAS keyboard differ from a traditional keyboard?
DAS (Docking and Attaching Station) keyboards are a type of keyboard that are designed to be used with multiple computers. Unlike traditional keyboards, DAS keyboards are not connected directly to a single computer but instead are connected to a docking station. This docking station is then connected to the computer, allowing the keyboard to be used with multiple computers without the need for reprogramming or switching between different keyboard layouts.
One of the main differences between a DAS keyboard and a traditional keyboard is that a DAS keyboard is not tethered to a single computer. This means that users can easily switch between multiple computers without having to physically unplug and replug in the keyboard. Additionally, DAS keyboards often have additional buttons and functions that are not found on traditional keyboards, such as media controls and programmable keys. These additional buttons and functions make DAS keyboards ideal for users who need to quickly access multiple applications and functions.
Another difference between DAS keyboards and traditional keyboards is the way they are powered. DAS keyboards are typically powered by a separate power source, such as a battery or an AC adapter, rather than being powered directly by the computer. This means that users can use a DAS keyboard with any computer that has a USB port, without the need for any additional software or drivers.
Overall, DAS keyboards offer a number of advantages over traditional keyboards, including their ability to be used with multiple computers, their additional buttons and functions, and their separate power source. If you are looking for a keyboard that can be easily switched between multiple computers, a DAS keyboard may be the perfect choice for you.
Why use a DAS keyboard?
DAS keyboard benefits
DAS keyboards, or “Data Entry Keyboards,” are specifically designed for individuals who spend a significant amount of time typing. These keyboards offer a range of features that make typing more comfortable, efficient, and accurate. Here are some of the benefits of using a DAS keyboard:
Reduced Risk of Repetitive Strain Injury (RSI)
One of the primary benefits of using a DAS keyboard is the reduced risk of developing repetitive strain injury (RSI). DAS keyboards are designed with ergonomics in mind, ensuring that the user’s wrists, hands, and arms are in a neutral position while typing. This reduces the strain on muscles, tendons, and ligaments, which can lead to pain and discomfort over time.
Increased Typing Speed and Accuracy
Another benefit of using a DAS keyboard is the potential for increased typing speed and accuracy. DAS keyboards often feature larger keys, better key spacing, and improved tactile feedback, making it easier for users to type quickly and accurately without making mistakes. This can be particularly helpful for individuals who work in data entry, transcription, or other fields where fast and accurate typing is essential.
Customizable Layouts and Key Mapping
Many DAS keyboards also offer customizable layouts and key mapping, allowing users to configure the keyboard to their specific needs. This can be particularly helpful for individuals who need to type in multiple languages or use specific keyboard shortcuts regularly. With customizable layouts and key mapping, users can create a layout that works best for them, reducing the need to switch between different keyboards or learn new layouts.
Improved Durability and Longevity
Finally, DAS keyboards are often built to last, with improved durability and longevity compared to standard keyboards. This means that DAS keyboards can withstand more frequent use and last longer over time, reducing the need for frequent replacements. This can be particularly helpful for individuals who use their keyboard frequently or in high-use environments.
Overall, DAS keyboards offer a range of benefits that can make typing more comfortable, efficient, and accurate. Whether you’re a data entry professional or simply spend a lot of time typing, a DAS keyboard may be a worthwhile investment to improve your typing experience.
DAS keyboard use cases
DAS keyboards, short for “Durable Access Switch”, are specialized input devices designed for users who require a more rugged and durable keyboard for their computing needs. These keyboards are often used in industrial, commercial, or public settings where the environment is harsher and more demanding than a typical office or home setup. Here are some common use cases for DAS keyboards:
Factories and manufacturing plants
In a factory or manufacturing plant, DAS keyboards are used by workers to control machinery, monitor processes, and perform other critical tasks. These keyboards are built to withstand the demands of a tough industrial environment, including exposure to dust, moisture, and rough handling. They are often equipped with additional keys or features that help workers operate equipment more efficiently.
Transportation and logistics
DAS keyboards are also commonly used in transportation and logistics settings, such as trucking companies, airports, and shipping yards. These keyboards are designed to withstand the rigors of constant use in a fast-paced environment, including exposure to weather, vibration, and heavy use. They may be equipped with special keys or features that help workers track shipments, manage routes, and communicate with other team members.
Healthcare and medical facilities
In healthcare and medical facilities, DAS keyboards are used by doctors, nurses, and other staff to access patient records, manage medical equipment, and perform other critical tasks. These keyboards are designed to be easy to clean and disinfect, which is important in a healthcare setting where hygiene is paramount. They may also be equipped with special keys or features that help healthcare workers navigate complex software systems and access important information quickly.
Public kiosks and terminals
DAS keyboards are also used in public kiosks and terminals, such as those found in airports, malls, and other public spaces. These keyboards are designed to withstand heavy use by multiple users, and may be equipped with additional features such as antimicrobial coatings to help prevent the spread of germs. They are also often designed to be easy to clean and maintain, as they may be subject to vandalism or damage.
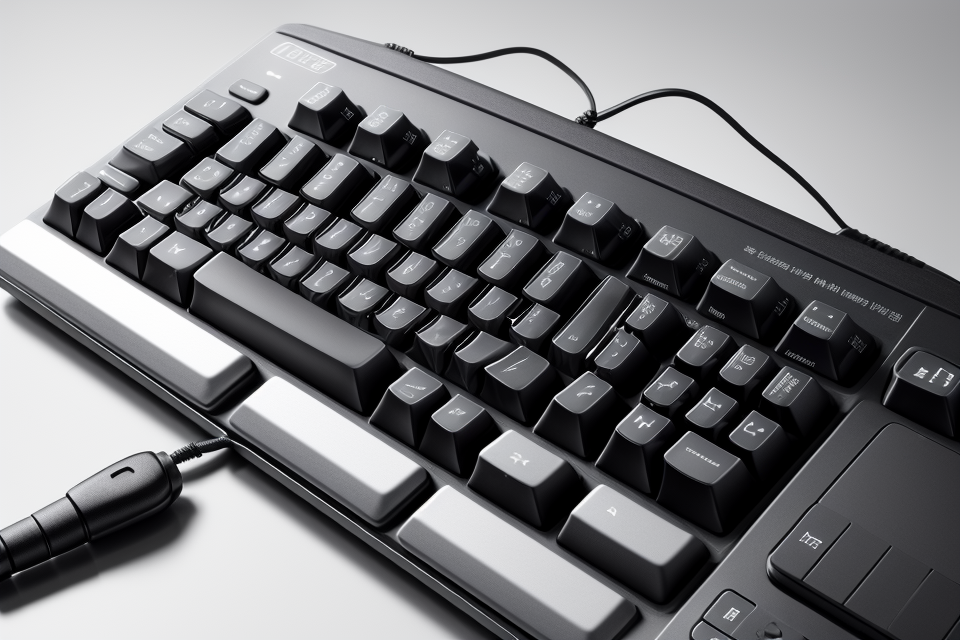
DAS keyboard examples
Connecting a DAS Keyboard: The Process
Step 1: Identify the DAS keyboard port
The first step in connecting a DAS keyboard is to identify the DAS keyboard port. DAS stands for Data Access System, and the DAS keyboard is a specialized keyboard used to connect to a computer system that provides data entry services.
To identify the DAS keyboard port, you will need to locate the port on the back of the computer system or on the keyboard itself. The DAS keyboard port is typically a 9-pin or 25-pin connector that is used to connect the keyboard to the computer system.
Once you have identified the DAS keyboard port, you can proceed to the next step in the process, which is to connect the DAS keyboard to the computer system.
Step 2: Check the DAS keyboard compatibility
When connecting a DAS keyboard, it is important to ensure that the keyboard is compatible with your computer system. Here are some steps to follow:
- Identify the type of DAS keyboard you have: Before checking compatibility, you need to know the type of DAS keyboard you have. This information can usually be found on the packaging or the keyboard itself.
- Check the keyboard’s specifications: Look for the specifications of the DAS keyboard, including the type of connector it uses, the number of keys, and any other relevant information. This information will help you determine whether the keyboard is compatible with your computer system.
- Check your computer’s specifications: Check the specifications of your computer system, including the type of port you have, the operating system, and any other relevant information. This information will help you determine whether the keyboard is compatible with your computer system.
- Compatibility with other devices: Some DAS keyboards may also be compatible with other devices, such as tablets or smartphones. Be sure to check the compatibility of the keyboard with these devices as well.
- Compatibility with software: Some DAS keyboards may also be compatible with specific software programs. Be sure to check the compatibility of the keyboard with the software you plan to use.
By following these steps, you can ensure that your DAS keyboard is compatible with your computer system and any other devices you plan to use it with. This will help you avoid any compatibility issues and ensure that you can use your DAS keyboard with ease.
Step 3: Gather the necessary connection tools
Step 4: Connect the DAS keyboard to the computer
To connect a DAS keyboard to your computer, follow these steps:
- Locate the DAS keyboard port: Find the DAS keyboard port on your computer. This port is typically located on the back or side of the computer.
- Identify the DAS keyboard cable: Locate the DAS keyboard cable that came with your keyboard. The cable should have a connector on one end that fits into the DAS keyboard port.
- Plug in the DAS keyboard cable: Plug the DAS keyboard cable into the DAS keyboard port on your computer. Make sure the cable is securely connected on both ends.
- Turn on the DAS keyboard: Turn on the DAS keyboard by pressing the power button on the keyboard.
- Test the connection: Test the connection by pressing any key on the DAS keyboard. If the keyboard is properly connected, you should see the corresponding characters on your computer screen.
Once the DAS keyboard is connected to your computer, you can start using it. Depending on your computer’s settings, you may need to adjust the keyboard layout or repeat delay settings to ensure optimal performance.
Step 5: Test the DAS keyboard connection
Once you have successfully connected your DAS keyboard to your computer, it’s important to test the connection to ensure that everything is working properly. Here are the steps to follow:
- Check the physical connection: Make sure that the USB cable is securely connected to both your computer and the DAS keyboard. If the connection is loose, the keyboard may not work properly.
- Power cycle the keyboard: Turn off your computer and unplug the USB cable from the keyboard. Wait for a few seconds, then plug the USB cable back in and turn on your computer. This helps to refresh the connection and ensure that the keyboard is properly recognized by your computer.
- Check the keyboard’s function keys: The function keys on your DAS keyboard may have special functions that are specific to the software you are using. Make sure that you test all of the function keys to ensure that they are working properly.
- Check the keyboard’s LED indicators: Some DAS keyboards have LED indicators that show the status of the keyboard connection. Make sure that the LED indicators are working properly and indicate that the keyboard is connected to your computer.
- Test the keyboard’s features: Depending on the software you are using, your DAS keyboard may have specific features that you need to test. For example, if you are using a gaming software, you may need to test the keyboard’s anti-ghosting and n-key rollover features.
By following these steps, you can ensure that your DAS keyboard is properly connected to your computer and that all of its features are working properly.
Step 6: Customize the DAS keyboard settings
Step 7: Use the DAS keyboard
Once you have successfully connected your DAS keyboard to your computer, you can start using it. Here are some tips on how to use the DAS keyboard:
- Familiarize yourself with the layout: The DAS keyboard may have a different layout than your previous keyboard, so it’s important to take some time to familiarize yourself with the new layout.
- Adjust the settings: You may need to adjust the settings on your computer to make the DAS keyboard work properly. For example, you may need to change the keyboard language or enable Sticky Keys.
- Practice using the keys: It may take some time to get used to the feel of the DAS keyboard. Practice using the keys to build up your speed and accuracy.
- Customize the keys: Many DAS keyboards allow you to customize the keys to suit your preferences. You can change the color of the keys, assign specific functions to certain keys, or even add new keys.
- Take breaks: As with any new activity, it’s important to take breaks when using the DAS keyboard. Your hands and wrists may become fatigued, so it’s important to take breaks to avoid injury.
By following these tips, you can ensure that you get the most out of your DAS keyboard and use it effectively for your typing needs.
Troubleshooting Tips for Connecting a DAS Keyboard
Common issues when connecting a DAS keyboard
Fixing connection issues
When you’re having trouble connecting your DAS keyboard to your computer, there are several troubleshooting steps you can take to resolve the issue. Here are some tips to help you fix connection problems:
- Check the connection method: The first step in fixing connection issues is to ensure that you’re using the correct connection method. If you’re using a wired connection, make sure that the USB cable is securely plugged into both your keyboard and your computer. If you’re using a wireless connection, ensure that the receiver is properly attached to your computer and that the keyboard is powered on.
- Check for loose connections: Loose connections can also cause connection issues. Make sure that the USB cable is securely plugged into both your keyboard and your computer, and that the receiver is properly attached to your computer. If you’re using a wireless connection, ensure that the receiver is properly attached to your computer and that the keyboard is powered on.
- Restart your computer and keyboard: Sometimes, simply restarting your computer and keyboard can resolve connection issues. Try turning off your computer and keyboard, waiting a few seconds, and then turning them back on.
- Update your drivers: If you’re using a wired connection, try updating your USB drivers. To do this, go to your computer’s device manager, find the USB driver, and update it. If you’re using a wireless connection, try updating your wireless drivers. To do this, go to your computer’s device manager, find the wireless driver, and update it.
- Check for software conflicts: If you’re using software that controls your keyboard, such as a macro program, try closing the software to see if it resolves the connection issue.
- Reset your keyboard: If none of the above steps work, try resetting your keyboard. To do this, press and hold the reset button on your keyboard for about 10 seconds, or until the lights on the keyboard start flashing. Then release the button and try connecting your keyboard again.
By following these steps, you should be able to resolve any connection issues you’re having with your DAS keyboard.
Solutions for non-functional keys
When connecting a DAS keyboard, non-functional keys can be a common issue that arises. Here are some troubleshooting tips to help you resolve this problem:
- Check for physical damage: Before attempting any other solutions, inspect the keyboard for any physical damage to the keys or keycap. This could be the cause of the non-functional keys.
- Clean the keyboard: Dirt and debris can accumulate under the keys, causing them to malfunction. Clean the keyboard by removing the keycap and using a brush or can of compressed air to remove any dirt or debris.
- Reconnect the keyboard: If the keyboard is not properly connected, it can cause non-functional keys. Check that the keyboard is securely connected to the computer and that all cables are properly connected.
- Update the keyboard driver: An outdated or corrupt keyboard driver can cause non-functional keys. Update the keyboard driver to the latest version by visiting the manufacturer’s website.
- Disable Sticky Keys: If the Sticky Keys feature is enabled, it can cause non-functional keys. Disable the Sticky Keys feature by pressing the Shift key five times in a row, and then click on the Settings icon in the System Clock.
- Check for conflicts: Non-functional keys can occur if there are conflicts with other devices. Check that there are no conflicts with other devices such as a mouse or printer.
- Try a different keyboard: If none of the above solutions work, try using a different keyboard to see if the issue is with the keyboard itself.
By following these troubleshooting tips, you should be able to resolve the issue of non-functional keys when connecting a DAS keyboard.
Adjusting key repeat delay and repeat rate
If you find that your DAS keyboard is not functioning as expected, there are a few troubleshooting tips you can try. One common issue is related to the key repeat delay and repeat rate settings. These settings control how quickly the keyboard repeats keys and how long it waits before repeating them.
Here’s how you can adjust these settings:
- Press the “Shift” key and then click on the “Settings” icon in the system tray. This will open the Keyboard Settings window.
- In the “Keyboard” tab, you will see the “Key Repeat” section. Click on the “Properties” button next to it.
- In the “Key Repeat” dialog box, you can adjust the “Delay” and “Repeat rate” settings. The “Delay” setting controls how long the keyboard waits before repeating a key press. The “Repeat rate” setting controls how quickly the keyboard repeats a key press.
- Experiment with different settings until you find the ones that work best for you.
If adjusting these settings does not solve the issue, you may need to try other troubleshooting steps or contact the manufacturer for further assistance.
Resolving compatibility problems
Dealing with driver conflicts
Dealing with driver conflicts can be a common issue when trying to connect a DAS keyboard. Here are some troubleshooting tips to help you resolve the issue:
- Restart your computer: Sometimes, a simple restart can resolve the issue. This can help refresh your system and may resolve any conflicts with your drivers.
- Update your drivers: Outdated drivers can cause conflicts with your keyboard. Ensure that you have the latest drivers installed for your keyboard and other peripherals.
- Check for conflicting devices: Other devices connected to your computer can cause conflicts with your keyboard. Check if there are any other keyboards or mice connected to your computer, and if so, disconnect them before connecting your DAS keyboard.
- Disable USB overdrive: USB overdrive is a software that allows you to remap your keyboard keys. If you have this software installed, it can cause conflicts with your keyboard. Disable USB overdrive and try connecting your keyboard again.
- Reinstall your keyboard drivers: If none of the above tips work, you may need to reinstall your keyboard drivers. You can download the latest drivers from the manufacturer’s website and follow the instructions to reinstall them.
By following these troubleshooting tips, you should be able to resolve any driver conflicts and connect your DAS keyboard successfully.
Handling physical damage to the DAS keyboard
Physical damage to the DAS keyboard can be a common issue that arises when connecting it to a computer. In this section, we will discuss some troubleshooting tips to help you handle physical damage to the DAS keyboard.
- Identifying Physical Damage
The first step in handling physical damage to the DAS keyboard is to identify the damage. Check the keyboard for any visible signs of damage such as broken keys, loose keys, or missing keys. Also, check for any visible signs of wear and tear on the keyboard.
- Cleaning the Keyboard
If the physical damage is minor, cleaning the keyboard may be enough to fix the issue. Use a soft, dry cloth to clean the keyboard. Avoid using any liquids or chemicals as they can damage the keyboard further.
- Replacing Broken Keys
If some of the keys are broken, you may need to replace them. You can purchase replacement keys from the manufacturer or online retailers. Follow the instructions provided with the replacement keys to ensure proper installation.
- Replacing the Keyboard
If the physical damage is severe, it may be necessary to replace the entire keyboard. This may require professional assistance, as it can be a complex process. Before replacing the keyboard, ensure that you have the correct keyboard model and compatible with your computer.
- Protecting the Keyboard
To prevent future physical damage to the DAS keyboard, it is important to protect it. Keep the keyboard clean and avoid exposing it to any liquids or chemicals. Additionally, you can invest in a keyboard cover or case to protect it from scratches and other forms of damage.
In conclusion, handling physical damage to the DAS keyboard requires identifying the damage, cleaning the keyboard, replacing broken keys, replacing the keyboard, and protecting the keyboard. Following these troubleshooting tips can help you fix the issue and prevent future damage.
Recap of the article
Importance of properly connecting a DAS keyboard
Properly connecting a DAS keyboard is crucial for several reasons. Firstly, a correctly connected keyboard ensures smooth and seamless communication between the user and the computer. Any interruption or delay in the connection can result in lost data, missed messages, or even system crashes. Therefore, it is important to ensure that the DAS keyboard is connected properly to avoid any potential issues.
Secondly, a correctly connected DAS keyboard ensures that all keys function correctly. A poor connection can result in some keys not working properly, which can be frustrating for the user. In some cases, a poor connection can also cause the keyboard to stop working altogether, which can be a major inconvenience.
Lastly, a properly connected DAS keyboard is essential for security purposes. If the keyboard is not connected correctly, it can be vulnerable to hacking or other cyber attacks. Therefore, it is important to ensure that the keyboard is connected properly to maintain the security of the computer and the data stored on it.
In summary, properly connecting a DAS keyboard is essential for seamless communication, proper functioning of all keys, and maintaining security. It is important to follow the correct procedure for connecting the keyboard to avoid any potential issues.
Final thoughts and recommendations
If you’ve made it this far, you’re almost there! Here are some final thoughts and recommendations to keep in mind when connecting your DAS keyboard:
- Be patient: Connecting a DAS keyboard can take some time, especially if you’re dealing with software or driver issues. Make sure to give yourself enough time to troubleshoot any problems that may arise.
- Don’t be afraid to seek help: If you’re still having trouble connecting your DAS keyboard, don’t hesitate to reach out to the manufacturer’s customer support team or a professional technician for assistance. They may be able to provide additional troubleshooting tips or solutions that you haven’t tried yet.
- Keep your keyboard updated: Make sure to keep your DAS keyboard’s software and drivers up to date. This can help improve connectivity and ensure that your keyboard is working optimally.
- Check for interference: Make sure that there are no other devices or sources of interference that could be causing connectivity issues with your DAS keyboard. This could include other wireless devices, cordless phones, or even large metal objects in the area.
- Try a different USB port: If you’re using a wired connection, try plugging your DAS keyboard into a different USB port to see if that resolves any connectivity issues.
- Restart your computer: Sometimes, simply restarting your computer can help resolve connectivity issues with your DAS keyboard.
By following these tips and recommendations, you should be able to connect your DAS keyboard without any issues. Remember to take your time, be patient, and don’t hesitate to seek help if you need it.


